Instructions
Click on the switch diagrams below to open and/or close them, and observe the results of the switch positions on the truth table.
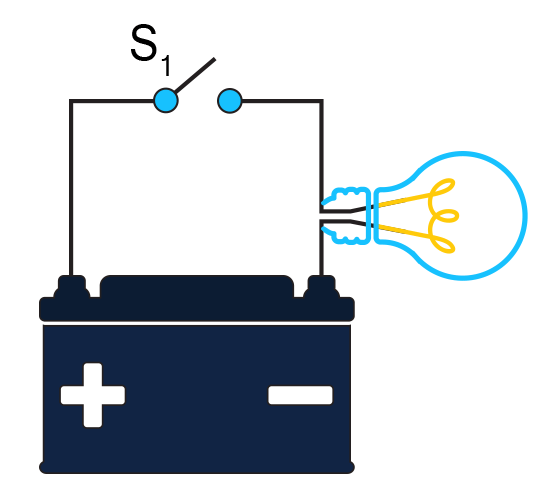
| S | L |
| 0 | 0 |
| 1 | 1 |
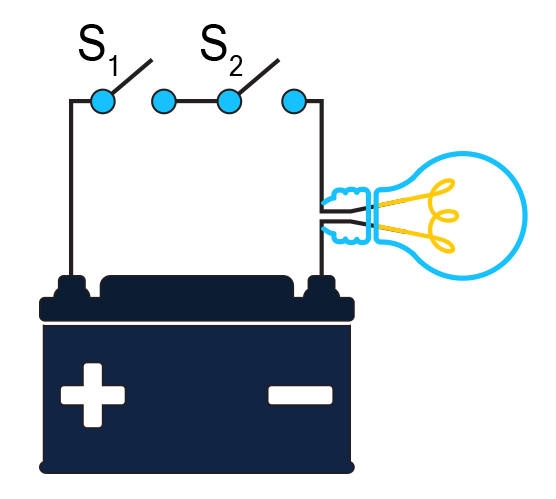
| S1 | S2 | L |
| 0 | 0 | 0 |
| 0 | 1 | 0 |
| 1 | 0 | 0 |
| 1 | 1 | 1 |
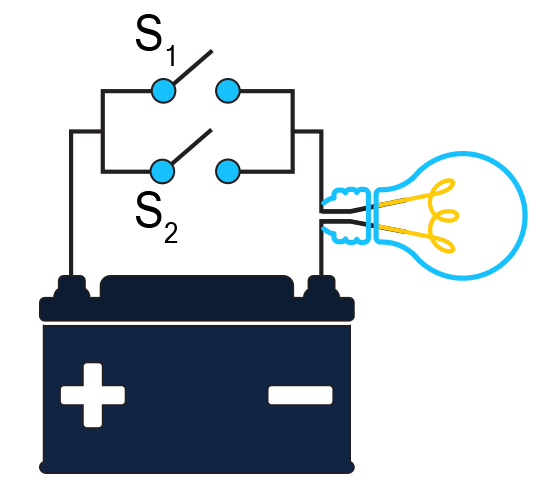
| S1 | S2 | L |
| 0 | 0 | 0 |
| 0 | 1 | 1 |
| 1 | 0 | 1 |
| 1 | 1 | 1 |
![]()

Click on the switch diagrams below to open and/or close them, and observe the results of the switch positions on the truth table.
| S | L |
| 0 | 0 |
| 1 | 1 |
| S1 | S2 | L |
| 0 | 0 | 0 |
| 0 | 1 | 0 |
| 1 | 0 | 0 |
| 1 | 1 | 1 |
| S1 | S2 | L |
| 0 | 0 | 0 |
| 0 | 1 | 1 |
| 1 | 0 | 1 |
| 1 | 1 | 1 |
![]()